Customers are scrambling to get Avaya Agent software deployed for remote workers to deal with the COVID19 work from home scenarios. Good news is that Avaya is providing temporary licensing. If your Agents can work from home using a VPN, they can set up remote worker quickly. If is important to note that the VPN can’t be doing NAT translations, and it must route to your voice VLAN for this to work!
To do this, install a copy, configure it, and then copy the configuration to other users. Here are some cheats I use to get this running fast!
First off – download the LATEST version of One-X Agent that is current and addresses bug fixes. It is available here.
Next – we want to set up one agent that is working perfectly that can be used to build a config that can be copied to others.
Unzip the download from Avaya and run OneXAgentSetup.exe. You will basically click “next” through the install. Don’t enable “Central storage of profile information” – that is only for companies using Avaya Control Manager. Select the languages you need. On the option screen, leave stuff unchecked unless you need click to dial from browsers. All other options should be default. Note that some users may not be able to install the software themselves if they don’t have admin access to their PC.
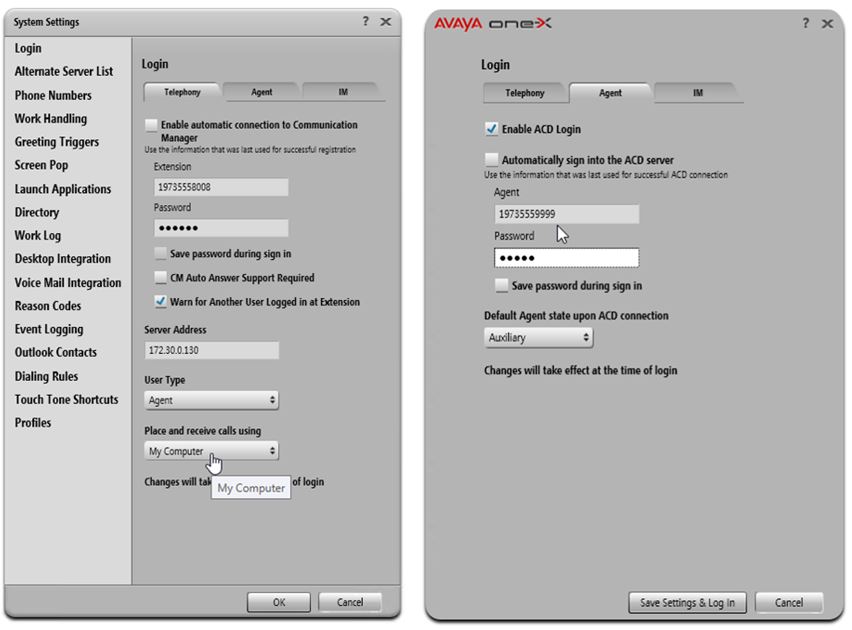
Start the Agent and click the “Change Login Settings” button. Enter the station, station password, and CM processor address on the Telephony tab. Set “Place and Receive calls using” to “My Computer”. Enter the Agent ID and password on the Agent tab. Click save settings and login.
At this point the Agent will try to login to the extension. If successful it will show “Registered”
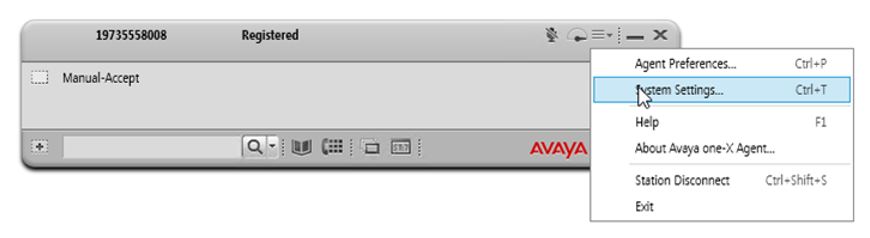
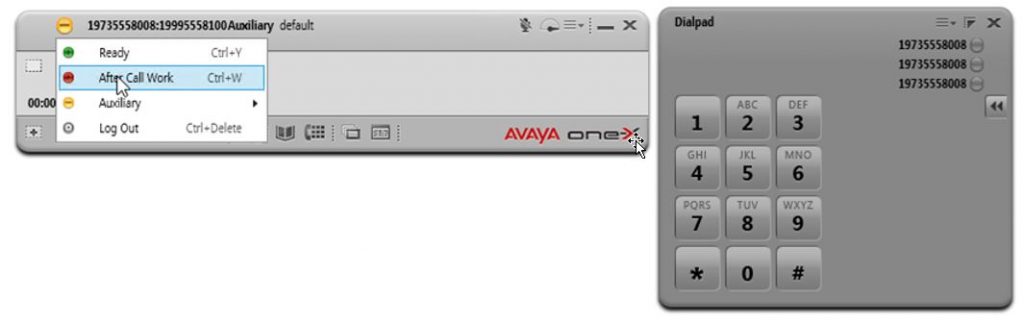
Next, click on the 3 bars on the top left and select System Settings…
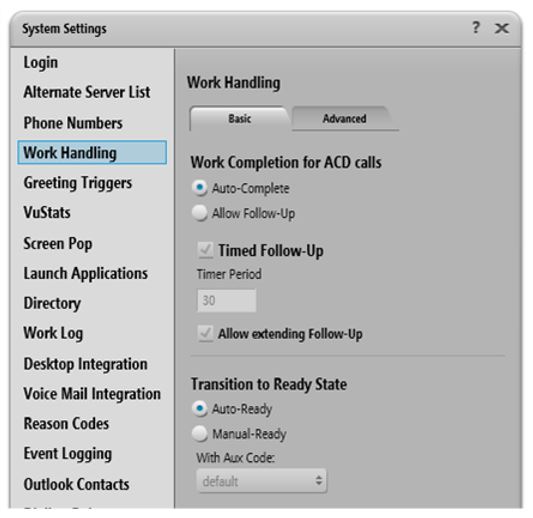
Make sure the Work Handling section meets the needs of your environment. You usually don’t need to change defaults.
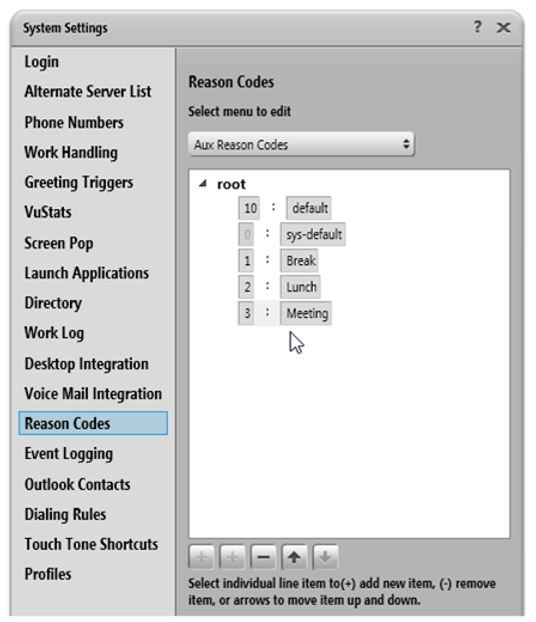
Also add Reason Codes to match what is listed in the PBX for Aux Work, Work, and Logout. You can find the list on the Communication Manager by entering “display reason-code-names”
At this point, you should be able to login the station and the agent. If the agent is not logging in, you are probably missing Agent buttons on the set. Check out this doc for more information – https://downloads.avaya.com/css/P8/documents/100069879
Test the agent. Tune any of the other config settings to make sure the agent can login and take calls. Make sure that you can switch between work modes. If not, you should check the reason codes in the config.
Now that you have one Agent working perfectly, you can do the same thing for everyone else, but we instead, let’s zip up the configuration files.
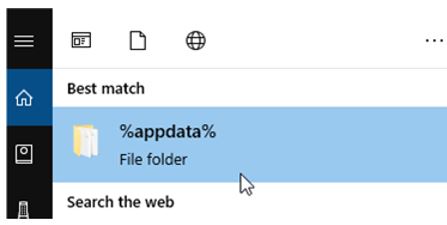
EXIT THE AGENT SOFTWARE the click start on your PC and type in %appdata%
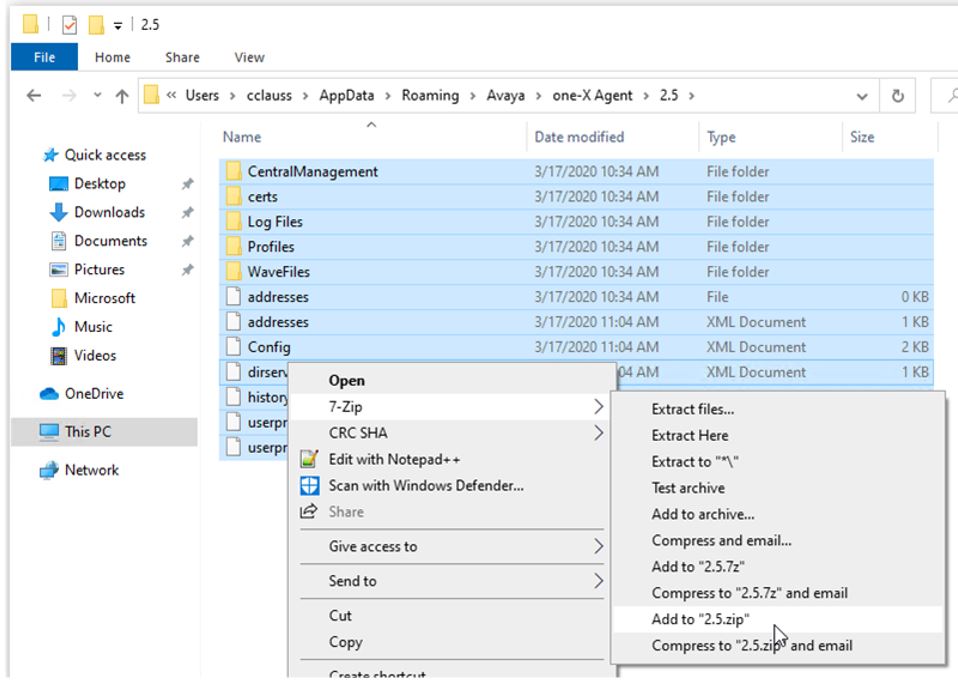
Then browse to the Avaya \ One-X Agent \ 2.5 folder. ZIP up the contents of this folder. This will contain all the configurations you just did.
Now install the Agent on other computers. You can follow the same install instructions as you did before, or you can use a silent install to push the software onto other machines. Run the following command to do a silent install with default options.
OneXAgentSetup.exe /qn
Last but not least, start Agent on the new computer so it creates the profile folder, then click “Cancel” without doing anything. This builds %appdata% the profile folder.
Unzip the file you created to the “ %Appdata% / Avaya / one-X Agent / 2.5 “ folder. Then start the Agent again and change the station and agent login information. You should be done! Savvy administrators could script this process to do the silent install and copy files to the computer in background.
Good luck – reach out with questions!
Be the first to reply