Many customers I have worked with over the past two weeks were getting call center staff up with Avaya’s One-X Agent and Agent for Desktop due to the need to have people working at home. I got many requests for a quick install guide for One-X Communicator. Communicator can be installed quickly and supports h.323 and SIP protocols.
For users that have a SIP infrastructure, Communicator can be used via an SBC remote worker configuration to give access to users from anywhere. If you don’t have an Avaya SBC, you can always connect your PC via VPN and use SIP or h.323 protocol. I will focus on h.323 first, and then add on some additional configuration you need for SIP.
Configuring for h.323 Protocol
First off, download the latest release of software here.
Unzip the file and run the “Avaya one-x Communicator Suite.exe”. You may need administrative access to install this on your computer.

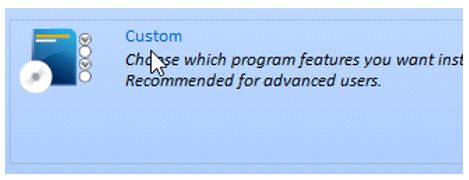
Select the language you wish to use and accept the EULA. The select Custom install.
Uncheck Avaya Collaboration Services. Most users will not use this service and you may have some issues with Office applications if you leave it on.

After that, click next through the install program and click finish. Go ahead and start the program.
Setting up for h.323 protocol…
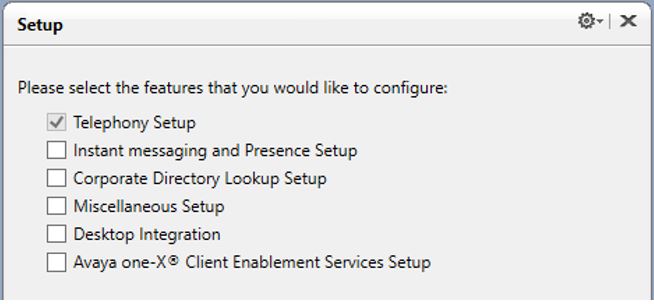
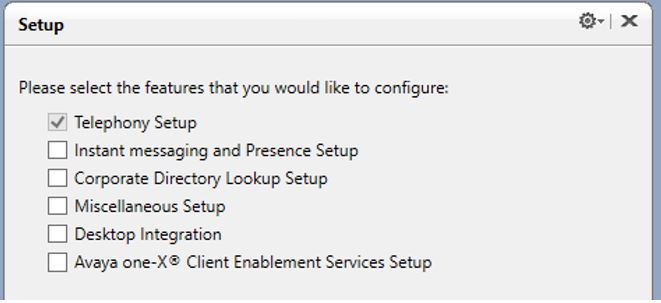
The first time you run the software you will be asked several questions. For a simple deployment, just leave “Telephony Setup” checked and click next.
Select H.323 protocol and click next.
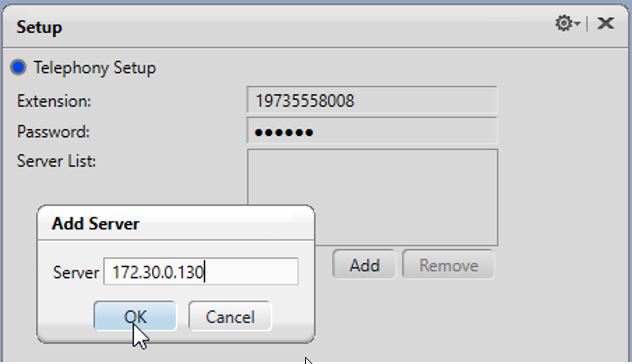
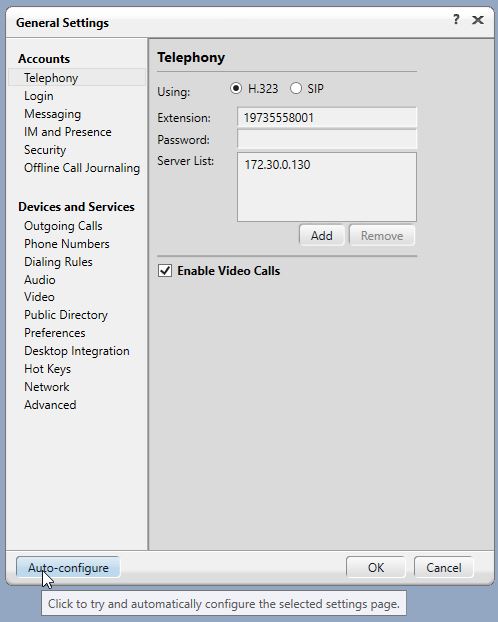
Enter your extension number, extension password, and click “Add” to enter the IP address of your Communication Manager.
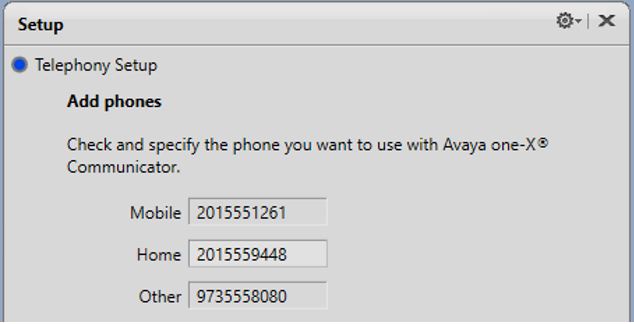
Click next and you be asked to add phones. These numbers are used if you wish to enable telecommuter mode. More on that later. You can skip this step if you are using VPN or SBC.
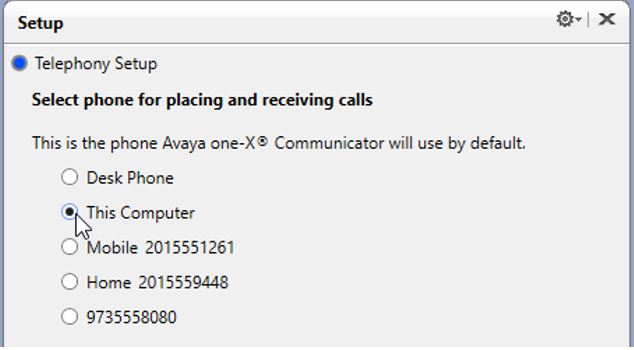
Next, you will be asked where you generally wish to make and receive calls. You normally will select “This Computer”.
Desk Phone – Communicator will control the Avaya phone on your desk.
This Computer – You will use your PC with a headset to make and receive calls.
Other numbers – you entered in the previous step. This is for telecommuter mode.
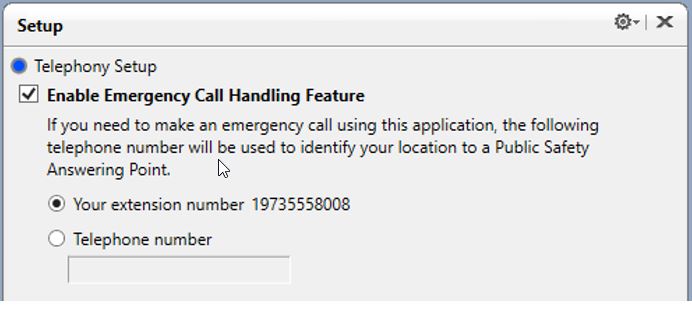
Last, enter information about emergency number handling – this allows your location to be identified if you call emergency services from Communicator. For a home worker, they may wish to specify your home or cell number here. Then click Finish.
Communicator will shut down. Go ahead and start it up again.
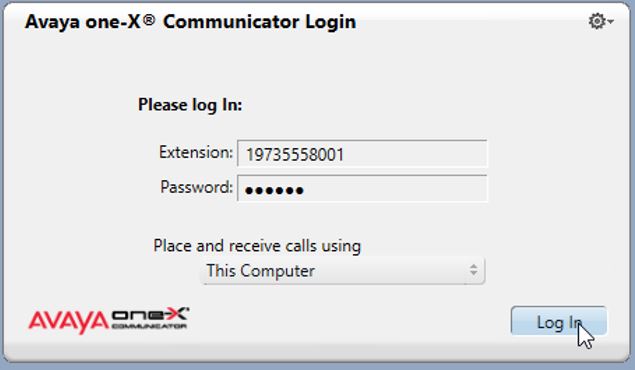
You will now be presented with a login screen. Your extension and password should be there. It will also show where you will make and receive calls. Click “Log In”. You may get a message about video calling – just uncheck the box so you don’t get the warning again.

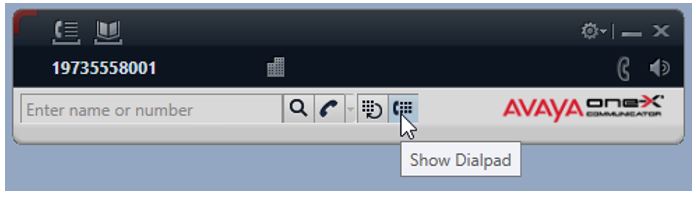
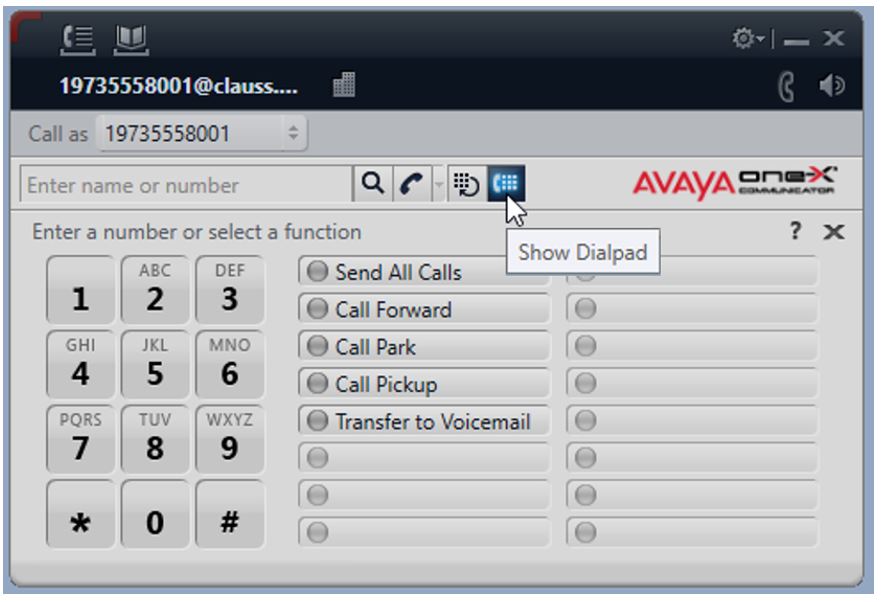
You are now logged in and can make and receive calls. To see your feature buttons, click on the dial pad.
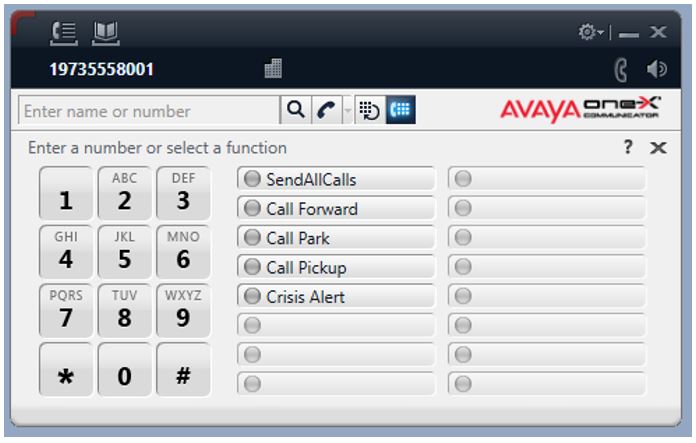
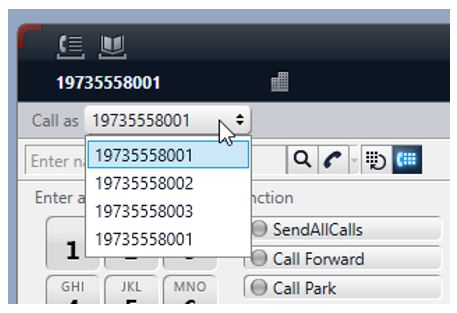
Now you get to play with the software. Note that the buttons may not be in the same order as your Avaya phone at the office. Also, bridge appearances will not show as buttons. Instead, they bridge will show who is being called when a call comes in. There will also be a “Call as” selection to specify if you are calling from your extension or one of the bridged appearances.
To configure other settings, such as dialing rules, audio & video device settings, directory integration, click on the gear icon and select Settings / General Settings.
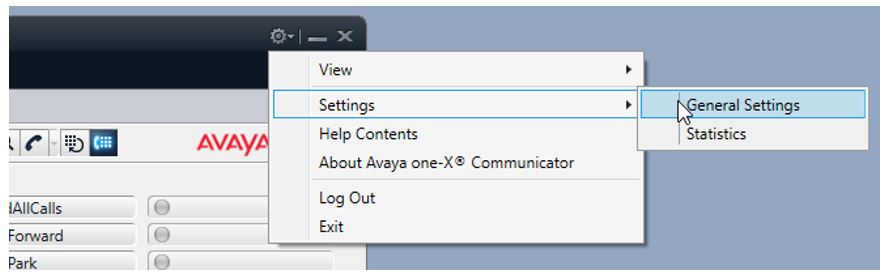
When you wish to end your workday, click the gear icon and select Log Out.
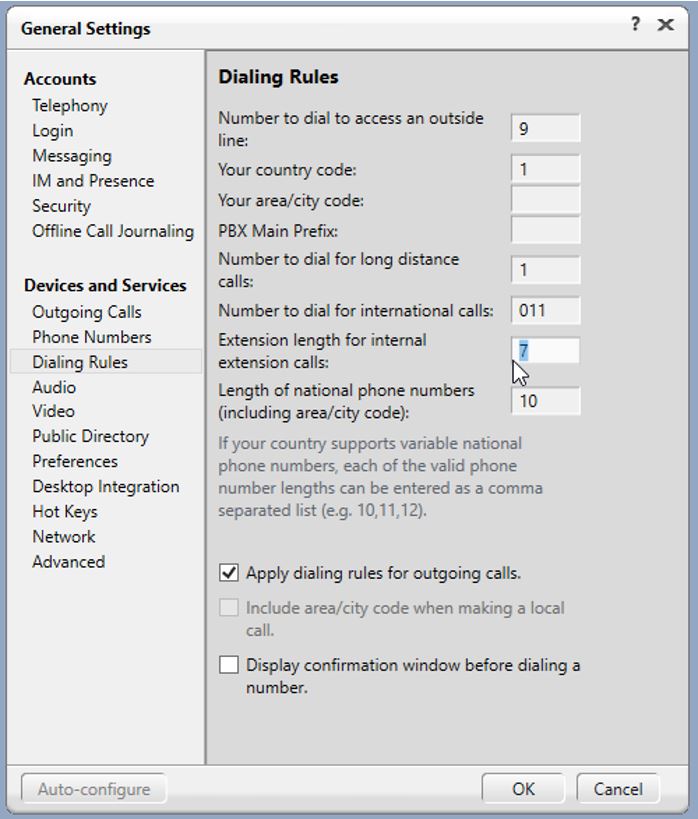
Note that by default the software will add a “9” before any number. Dialing rules can be turned off if you wish. Be sure to check that the extension length is correct.
Configuring for SIP protocol…
The first time you run the software you will be asked several questions. For a simple deployment, just leave “Telephony Setup” checked and click next.
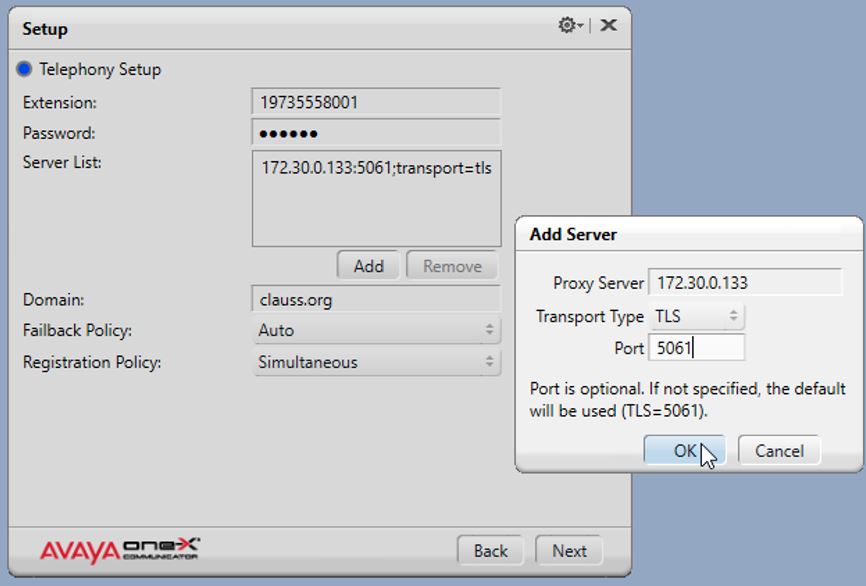
Select SIP protocol and click next.
Enter your extension number, extension password, and SIP domain, then click “Add” to enter the IP address of your Session Manager SM100. Don’t enter the management address of the Session Manager. For the transport type select TLS and 5061 for the port.
Note that feature buttons generally will only work if using TLS protocol. If using TCP, it is likely you will be able to register the phone and make and receive calls, but you won’t see buttons. If you want to know more about why this is the case, drop me an email.
Continue with the rest of the prompts as shown in the h.232 section above. Before we can run Communicator and login, you probably must do two things. Install the certificate for Session Manager and change a setting in the installconfig.xml file.
Installing the certificate for Session Manager…
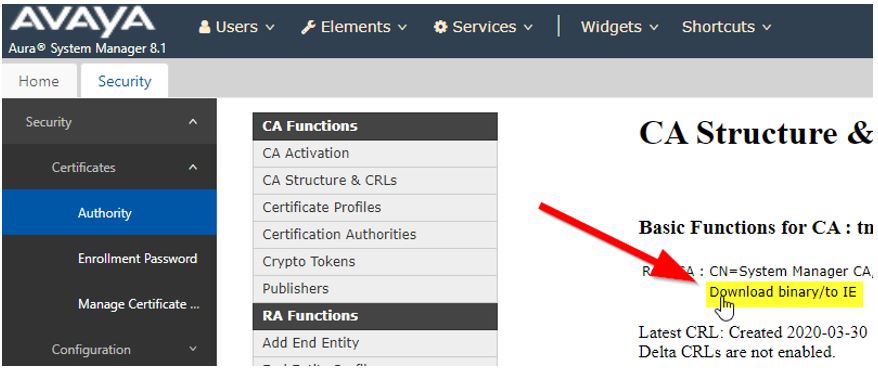
Have your system administrator provide the root certificate that authenticates your Session Manager server. This is usually your System Manger root certificate, but it may be another certificate authority. If using System Manager, your administrator can get the certificate from Services / Certificates / Authority / CA Structure & CRLs / Download binary/to IE
Once you download the file and copy to your computer, open the file and click “Install Certificate…”
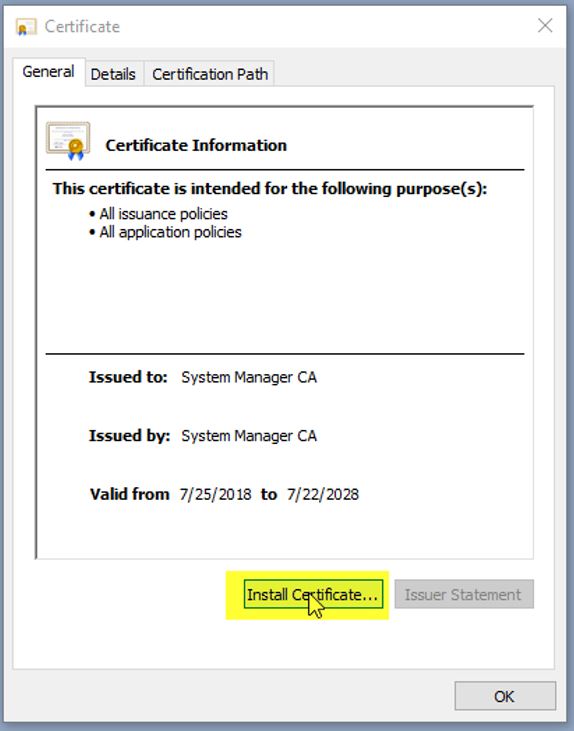
Select Local Machine, then click Next. Select the option to Place all certificates in the following store and select Trusted Root Certification Authorities. Click OK and finish the certificate install.

Lastly, edit the following file with a text editor. Make sure Communicator is closed first.
C:\Program Files (x86)\Avaya\Avaya one-X Communicator\InstallConfig.xml
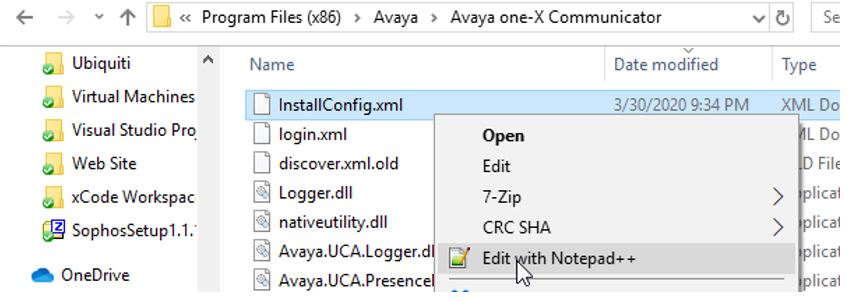
Make sure that the file includes the following line:
<EnableHostnameValidation>false</EnableHostnameValidation>
Here is my file:
<?xml version=”1.0″ encoding=”UTF-8″?>
<InstallConfig xmlns=”http://xml.avaya.com/endpointAPI”>
<CitrixMode>false</CitrixMode>
<CultureName>en-US</CultureName>
<DscpForVideo>0</DscpForVideo>
<EnableCCEIntegration>true</EnableCCEIntegration>
<EnableVideo>true</EnableVideo>
<IsUpgrade>false</IsUpgrade>
<MaxTrustCerts>-1</MaxTrustCerts>
<SignalProtocol>2</SignalProtocol>
<EnableHostnameValidation>false</EnableHostnameValidation>
</InstallConfig>
Now go ahead and start Communicator and login with your extension and password. Press the “Show Dialpad” button and make sure that your softphone shows feature buttons. If not, there is a problem with Personal Profile Manager (PPM) and certificates between the CM and Session Manager. You will probably need help fixing that from Avaya or ConvergeOne.
Some things to check if things are not working…
- IP Softphone must be enabled on page 1 of the CM station form.
- For h.323 stations, the security code needs to be set on the same form.
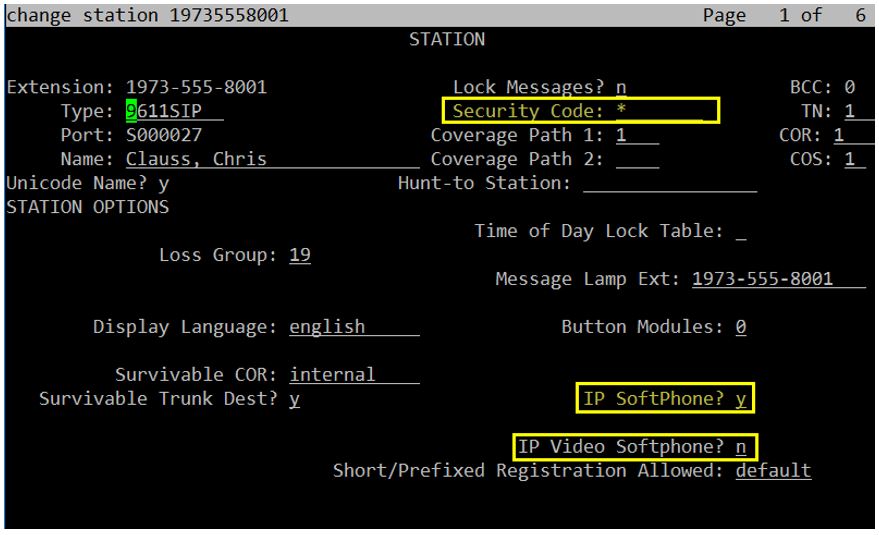
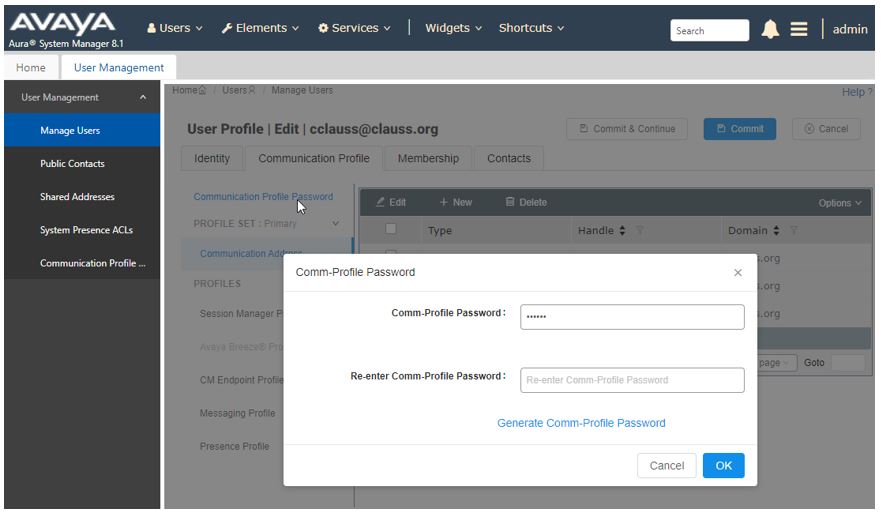
For SIP stations, the station password is set on the user profile in System Manager. The station password on CM is not used.
Auto Configuration of Communicator
Communicator also has the ability to read a 46xxsettings.txt file so you don’t have to manually configure the settings. Unfortunately, you must add a file to the installation for this to work. Communicator looks for a file called “discover.xml” to allow it to auto configure settings.
Place the file in the installation folder –
C:\Program Files (x86)\Avaya\Avaya one-X Communicator

Here is a copy of the discover.xml that I am using…
<?xml version=”1.0″ encoding=”utf-8″?>
<Discover xmlns:xsi=”http://www.w3.org/2001/XMLSchema-instance” xmlns:xsd=”http://
www.w3.org/2001/XMLSchema” xmlns=”http://xml.avaya.com/endpointAPI”>
<AutoRun>true</AutoRun>
<AutoRunDateTime>2013-12-31T23:59:59</AutoRunDateTime>
<Server>172.30.0.140</Server>
<ServerDirectory></ServerDirectory>
<ServerFile>communicator.txt</ServerFile>
<Group>0</Group>
</Discover>
The key fields you need to set are
- Autorun – true / false – if auto configure happens every time you start
- Server – the IP address or host name of your Utility Server of Web Server that hosts your 46xxsettings.txt file
- Server Directory – the folder that contains the file – usually blank for root folder
- Server File – the name of your configuration file. In the example above I named my file communicator.txt, but you can also use your 46xxsettings.txt
- Group – This specifies which group settings you wish to use in your settings file for the Communicator.
Here is a copy of the “communicator.txt” file I am using. My file is very simple – just configuring the server address. You can add other items such as dialing rules.
SET MCIPADD 172.30.0.130
SET GMTOFFSET -5:00
SET NO_DIGITS_TIMEOUT 60
SET TRUSTCERTS SystemManagerCA.cacert.txt
SET TLSSRVRID 0
Now when you start communicator, you will see it trying to discover settings

Communicator will find settings and ask you for what it still needs.
You can also refresh settings manually by clicking the Auto-Configure button in the settings screen.
For more information on auto configuration, check out the Avaya one-X Communicator Centralized Administration Tool Guide. You can configure additional settings such as:
- Login Settings
- Dialing Rules
- General Settings
- Feature Settings
- Button Names
Good luck on your installs. I hope this helps. Let me know what information needs to be added and drop me questions here or via email.
Be the first to reply